How to enable the External trigger functionality for IMU, TAA and TAG devices
Purpose: Learn how enabling trigger functionality for IMU Last Updated: June 2025
The article provides instructions on enabling the external trigger functionality to output special data packets after receiving an external trigger on the unit’s defined pin for IMU, TAA, and TAG devices.In this mode, the device continues to compute data at its standard internal rate of 2 kHz (or 4 kHz, depending on the model) and outputs the latest estimated data packet upon detecting the trigger on the corresponding pin. To use the external trigger functionality, the device should be configured in the following way:
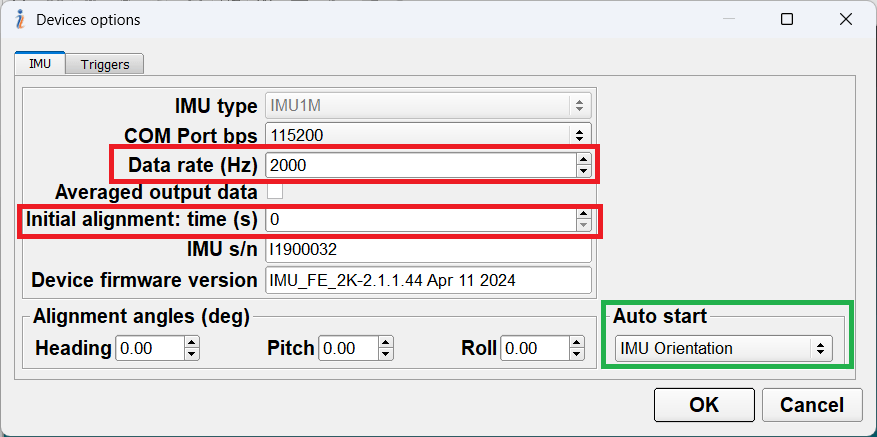
In the “Device options” menu-> “IMU” tab: Set the output rate to max 2000Hz. Set the initial alignment to 0 seconds. (Optional) Select the required output in the Auto Start drop-down. This parameter is optional since there are two ways to start operation in trigger mode: you can send the required command (IMU GA, IMU Orientation, etc.) via GUI or directly from the host, OR you can configure the device to work in Auto Start mode. In this case, the device will start operation once the power is applied without waiting for commands from the host computer.
Fig.1 IMU tab configuration
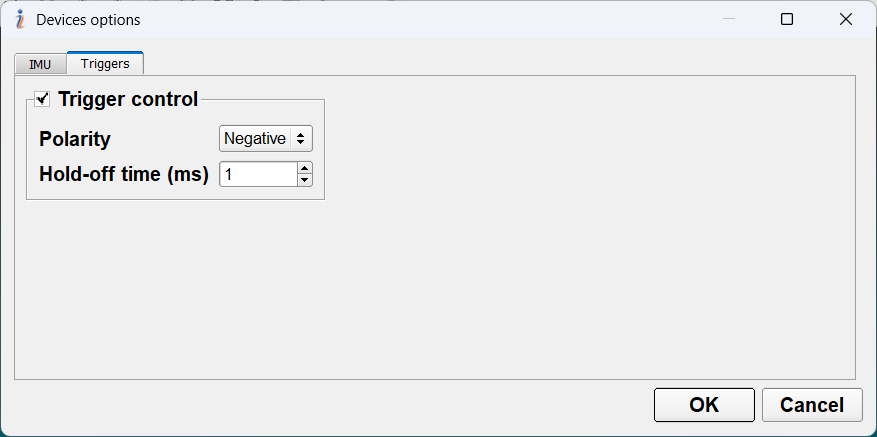
In the “Device options” menu -> “Triggers” tab:
Set the “Trigger control” checkbox
Set required polarity and hold-off time (period). Polarity is Positive – from low to high and Negative – from high to low. Period or hold-off time is a time, in milliseconds, during which subsequent pulses after an initial pulse are ignored (to avoid false triggering due to the spikes and jitter).
Fig.2 Triggers tab configuration
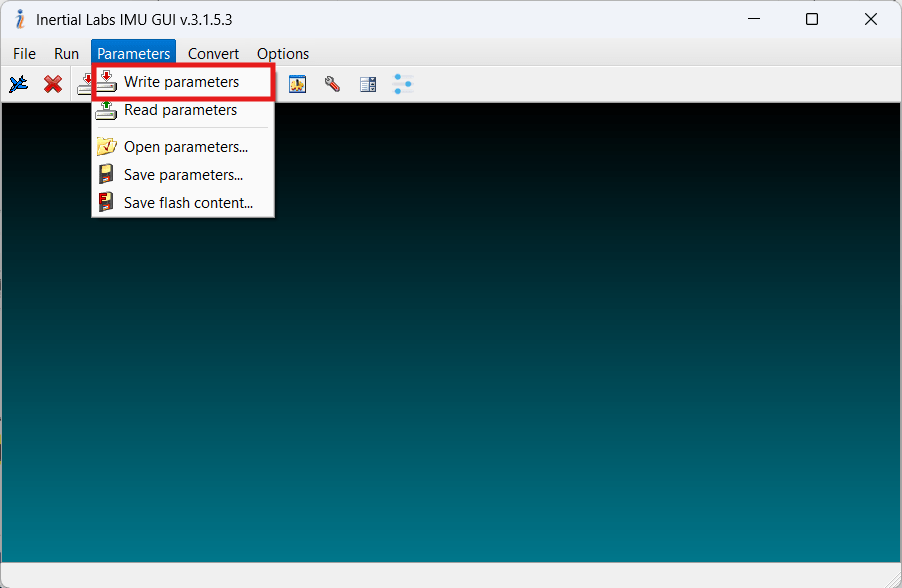
Save the parameters into device flash by clicking “OK” (for older IMU GUI versions) in the “Device options” menu or by clicking “OK” and then “Write parameters” button under parameters menu for IMU GUI version 3.0.0.0 and higher:
Fig.3 Write parameters
Then, to activate the trigger mode, the sensor should be power-cycled. If the auto start was selected, the unit is already computing the data and will provide the data once triggered. Otherwise, to start the sensor, if using GUI, select the required output format in the “Test options” menu and click “Start” in the “Visualization” tab; or, if using direct commands from the host, the corresponding command should be sent to the sensor.
If you have any questions or inquiries or require further information about Inertial Labs’ cutting-edge technologies, navigation solutions, or our extensive range of products and services, please don’t hesitate to reach out. Our dedicated team of experts is here to assist you. We value your curiosity and are committed to providing comprehensive answers and guidance to address your needs. Contact us today, and let’s embark on a journey of innovation and precision together. Your success is our priority, and we look forward to hearing from you.
Website maintenance has been scheduled for Sunday, April 2 from 7 am to 9 pm EDT. The resource may be unavailable at this time. Please accept our apologies for any inconvenience.